View Templates
As indicated in other posts (Lean Design with REVIT), sheets and views should be set up as early as possible, utilizing standard AEA view templates. A series of standard view templates have been created and preloaded into our office template files. These viewports cover the most common drawing types, other than plan views. See below for a list of standard View Templates:
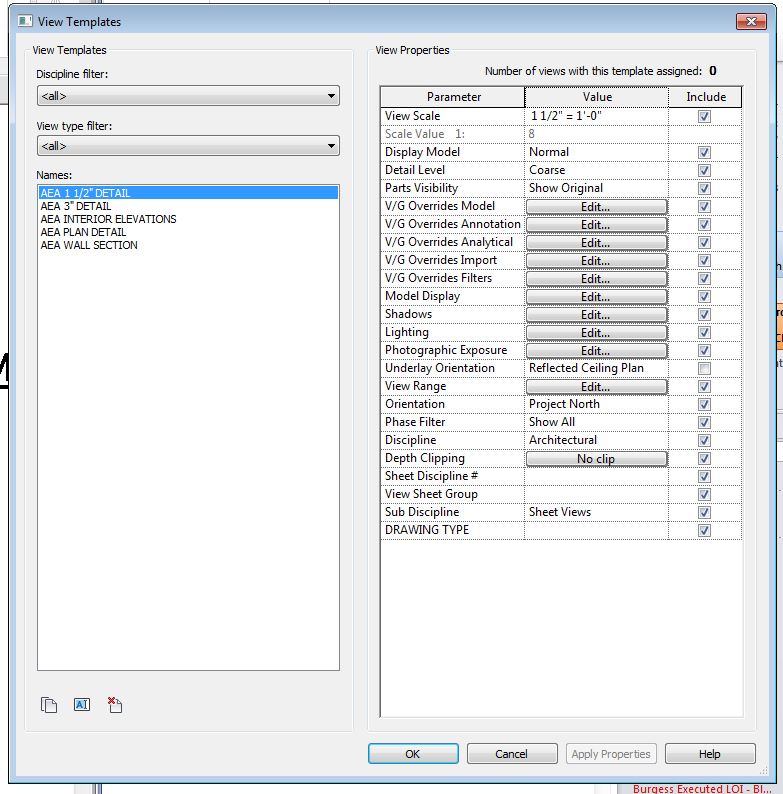
Since each project varies on the exact view templates required, additional view templates will need to be created by the project BIM Coordinator, including plan views. Also, the standard view templates may need to be modified on a project by project basis, depending on your project. For example, if you have linked consultant files, the view templates will need to be updated to control how these model display in our views. Review with your project BIM Coordinator, or a member of the BIM team for assistance.
Once the view templates are in your file, they must be assigned to your views. The easiest and most efficient way to do this, is through your properties window. Double click on the view that you wish to update from the project browser. Once in the view you wish to apply a template too, scroll down to the identity data section of the properties window.

When a view does not have a view template assigned, the Identity will indicate <None> as seen in the above image. To apply a view template, click on the none button. This will bring you to the view template dialog box where you can select the appropriate view template to apply, clicking on the view template and clicking the apply button, then hitting OK the exit the view template window. Once this is completed, the Identity Data field will be updated to the selected view template and your view will be updated accordingly.

Using View Templates will not only ensure a consistent appearance of drawings throughout your set and our office, but will save you time previously spent on hiding elements, adjusting lineweights, etc. on a view by view basis.
Since each project varies on the exact view templates required, additional view templates will need to be created by the project BIM Coordinator, including plan views. Also, the standard view templates may need to be modified on a project by project basis, depending on your project. For example, if you have linked consultant files, the view templates will need to be updated to control how these model display in our views. Review with your project BIM Coordinator, or a member of the BIM team for assistance.
Once the view templates are in your file, they must be assigned to your views. The easiest and most efficient way to do this, is through your properties window. Double click on the view that you wish to update from the project browser. Once in the view you wish to apply a template too, scroll down to the identity data section of the properties window.
When a view does not have a view template assigned, the Identity will indicate <None> as seen in the above image. To apply a view template, click on the none button. This will bring you to the view template dialog box where you can select the appropriate view template to apply, clicking on the view template and clicking the apply button, then hitting OK the exit the view template window. Once this is completed, the Identity Data field will be updated to the selected view template and your view will be updated accordingly.
Using View Templates will not only ensure a consistent appearance of drawings throughout your set and our office, but will save you time previously spent on hiding elements, adjusting lineweights, etc. on a view by view basis.